How to Choose the Best Outdoor Lighting?
Outdoor Lighting can make a garden safer to walk through, bring texture to a stone wall, and extend the use of a patio after sunset. It can also create glare, waste energy, or flatten a carefully planted space. The difference often comes down to thoughtful choices, not the number of fixtures. Lighting designer Randall Whitehead is often associated with the phrase, “Lighting is the jewelry of the home.” Outdoors, that idea works best when light highlights a few details rather than competing with the whole landscape.
Start by considering how each area is used. A path may need low, even illumination, while steps benefit from clear light at foot level. For a seating area, warm, shielded fixtures can make faces visible without shining into a neighbor’s window. Check the beam direction at night. Small adjustments matter.
Then compare fixture durability, color temperature, control options, and energy use. Look for products designed for outdoor exposure, and check their stated weather resistance and installation requirements. A dimmer or timer can help avoid leaving lights on all night. Subtle is often enough.
There is no single layout for every yard. A narrow path, a mature tree, and a small balcony call for different solutions. Even a careful plan can miss an awkward shadow or a bright reflection on glass. Review the setup after dark, make changes, and resist the urge to illuminate everything. The best Outdoor Lighting feels useful first—and beautiful without trying too hard.
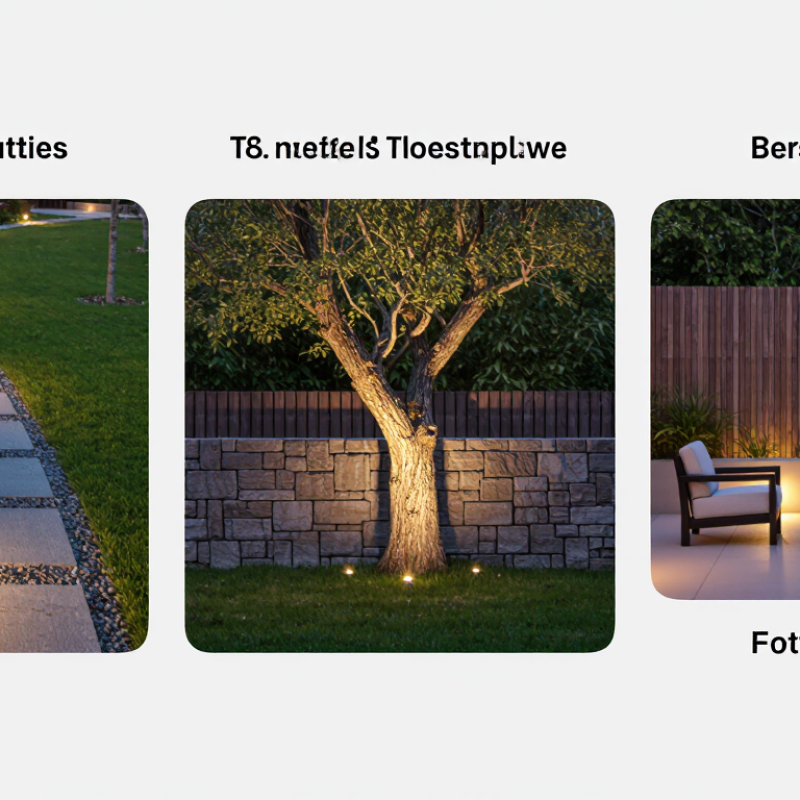
Map the Site and Set Task-Based Light Levels in Lux or Foot-Candles
Start with a simple site map, not a fixture list. Mark paths, steps, doors, seating, work areas, trees, and places where shadows collect. Note existing lights and nearby windows. A clear map helps separate safety needs from decorative ones.
Set a light target for each task. As a starting point, paths may need about 5–10 lux, while steps and entrances often benefit from 10–20 lux. A covered workbench may need 50–100 lux for close-up tasks. These are practical ranges, not rigid rules; surface color, weather, and eyesight change how bright an area feels. One foot-candle equals about 10.76 lux. Use one unit consistently when comparing measurements.
Check light where the task happens. Measure paths at ground level, then check faces near doors at standing height. Avoid bright pools beside deep shadows; even a high reading can leave a step hard to see. A handheld light meter can help, though phone readings are only rough estimates. Walk the site after dark and look from normal approach angles. A first map will miss something. Revise it when a shrub blocks a beam or wet paving reflects light into someone’s eyes.
How to Choose the Best Outdoor Lighting?
Map the site and set task-based light levels in lux or foot-candles.
These illustrative planning targets range from 10 lux (about 0.9 foot-candles) for walkways to 100 lux (about 9.3 foot-candles) for outdoor task areas. Measure illuminance on the relevant surface, then adjust for the task, site conditions, and applicable local requirements.
Choose Shielded Fixtures at 3000 K or Below, as DarkSky Recommends
Outdoor lighting works best when it puts light on a path, not into a neighbor’s window or the night sky. DarkSky recommends fully shielded fixtures and light sources rated 3000 K or lower. That warmer color can reduce short-wavelength blue light, which contributes more to skyglow than warmer-colored light. Keep beams pointed down. Use only the brightness needed to see steps, gates, and house numbers.
A 2023 study in Science analyzed 2011–2022 observations from citizen scientists and estimated that visible night-sky brightness increased by about 9.6% per year. That global estimate is not a prediction for any single street, but it shows why stray light matters. The American Medical Association’s 2016 guidance also advised using outdoor LED lighting at 3000 K or below and minimizing glare. Read fixture labels carefully: color temperature alone does not tell you whether light is shielded.
Stand on the sidewalk after installation and check where the beam lands. A small hood or lower mounting angle may fix spill onto a bedroom window. I admit, a brighter porch can feel safer. But brightness alone does not guarantee clearer visibility; harsh glare can make nearby details harder to see. A motion sensor can help, though I still find its settings easy to overlook.
Apply IEC 60529 IP Codes: IP65 Is Dust-Tight and Protects Against Water Jets
How to Choose the Best Outdoor Lighting?
When choosing outdoor lighting, check the IP rating against the fixture’s actual exposure. Under IEC 60529, IP65 means the enclosure is dust-tight and protected against water jets. The first digit, 6, indicates no dust ingress during the specified test. The second digit, 5, indicates protection against water projected from a nozzle. That distinction matters.
IP65 can suit lights exposed to rain, windblown dust, or occasional cleaning with a hose. It does not mean the fixture can be submerged or left in standing water. A low garden light beside a drainage channel may need a different rating or better placement. I used to read “water-resistant” too broadly; the test conditions are more limited than that phrase suggests. Check the manufacturer’s instructions for mounting position, cable entry, and cleaning methods.
Installation also affects protection. A damaged gasket, loose cover, or poorly sealed cable gland can weaken an enclosure’s performance. Look for intact seals before fitting the light, and avoid directing a pressure washer at it. Even a good rating cannot fix careless installation. Note how water moves across the wall or path after heavy rain.
Compare LED Output and Energy Use: DOE Reports at Least 75% Less Energy
How to Choose the Best Outdoor Lighting?
When comparing outdoor lights, look beyond the wattage printed on the package. Check lumens to judge brightness, then compare watts to see how much electricity the fixture uses. The U.S. Department of Energy reports that LEDs use at least 75% less energy than incandescent lighting. That comparison is useful, but it is not a promise that every home will save exactly 75%. Your results depend on the old fixture, nightly run time, and chosen brightness. A 700-lumen path light may be enough beside a garden walk; a wide driveway may need a different beam pattern. Small details matter.
Tips: Match lumens before comparing energy use. Choose a shielded fixture to direct light onto steps, not into a neighbor’s window. A timer or motion sensor can reduce hours of operation. Check the product’s listed wattage and outdoor rating.
In practice, replace the bulbs or fixtures you use most often first, such as a porch light that stays on until morning. Note its current wattage and typical hours, then compare those figures with the LED option. Lower wattage generally means lower energy use at similar brightness. Still, advertised brightness can feel different across color temperatures and beam angles. I have found that a cool, sharp beam can feel harsher than expected near a front door, so review the specifications and test placement when possible.
How to Choose the Best Outdoor Lighting? — Compare LED Output and Energy Use | Light Source | Approx. Output | Typical Input Power | Estimated Energy Use
(5 hours/day) | Estimated Savings vs. Incandescent | Outdoor Selection Tip |
| Incandescent | About 800 lumens | 60 W | 109.5 kWh/year | Baseline | Check that the lamp and fixture are rated for the location; incandescent lamps use more energy for comparable light output. |
| Halogen | About 750–850 lumens | Approximately 43–53 W | Approximately 78–97 kWh/year | Approximately 12–29% | Compare lumens rather than wattage alone, since output varies by lamp. |
| Compact fluorescent (CFL) | About 800 lumens | Approximately 13–15 W | Approximately 24–27 kWh/year | Approximately 75–78% | Choose a product specifically rated for outdoor use and the expected temperature conditions. |
| LED | About 800 lumens | Approximately 8–10 W | Approximately 15–18 kWh/year | Approximately 83–87% | Look for the required lumens, a suitable color temperature, and a fixture or lamp rated for damp or wet locations as needed. |
Estimates use 5 hours of operation per day and calculate annual energy use as watts × 1,825 hours ÷ 1,000. Actual output and wattage vary by product. The U.S. Department of Energy reports that residential LEDs use at least 75% less energy than incandescent lighting; compare product lumens to select similar light output.
Add Dimmers, Timers, and Motion Sensors, Then Check Local Electrical Codes
Outdoor lighting should feel useful, not harsh. Dimmers help soften a bright patio for dinner or reduce glare along a walkway. Check that each dimmer is compatible with the light source and fixture. A mismatch can cause flickering or uneven brightness. Small details matter.
Timers can switch path or porch lights on at dusk and off later, saving you from remembering every night. Motion sensors work well near gates, garages, and side entrances. Aim them toward approaching people, not moving branches or busy streets. Test the sensor after dark. A few adjustments may be needed.
Controls still need to suit the electrical setup. Before buying or installing anything, check local electrical codes for requirements involving outdoor wiring, weather-resistant enclosures, and approved locations. Rules can differ by area, so don’t rely on a neighbor’s setup as a guide. If wiring changes are needed, consult a qualified electrician. I have found that sensor placement is rarely perfect on the first try; even a careful plan may need a second look after rain, wind, or a week of ordinary use.