How to Choose Foaming Paste for Screen Printing in 2026?
Choosing Foaming Paste For Screen Printing in 2026 requires more than comparing prices or foam height. The right paste must match the fabric, mesh count, stencil thickness, curing equipment, and final hand feel. A soft cotton shirt may need a flexible, low-density foam. A sports garment may demand stronger wash resistance and controlled expansion. Small differences matter.
Screen-printing educator Terry Combs offers a useful principle: “Control the basics before chasing speed.” That advice fits foaming applications closely. If the screen is under-tensioned, the paste can deposit unevenly. If the squeegee pressure is excessive, the foam layer may flatten. If curing is incomplete, the raised surface may crack after washing. These problems are easy to miss under bright production lights.
Measure carefully. Test early.
This guide will examine viscosity, expansion ratio, mesh selection, drying behavior, curing temperature, storage stability, and fabric compatibility. It will also compare water-based and plastisol-compatible options where relevant. Product data sheets help, but they do not replace a real test print. A paste that performs beautifully on a 100% cotton swatch may behave poorly on recycled polyester. That is an uncomfortable limitation.
Expect practical evaluation, not perfect formulas. Foam height can vary between batches. Humidity can change drying time. A successful choice balances appearance, durability, production speed, worker control, and customer expectations. The best Foaming Paste For Screen Printing is not always the thickest or most dramatic option. It is the one that remains consistent from the first shirt to the last.
Define Foam Height Targets: 0.5–2.0 mm and 2–5× Expansion
How to Choose Foaming Paste for Screen Printing in 2026?
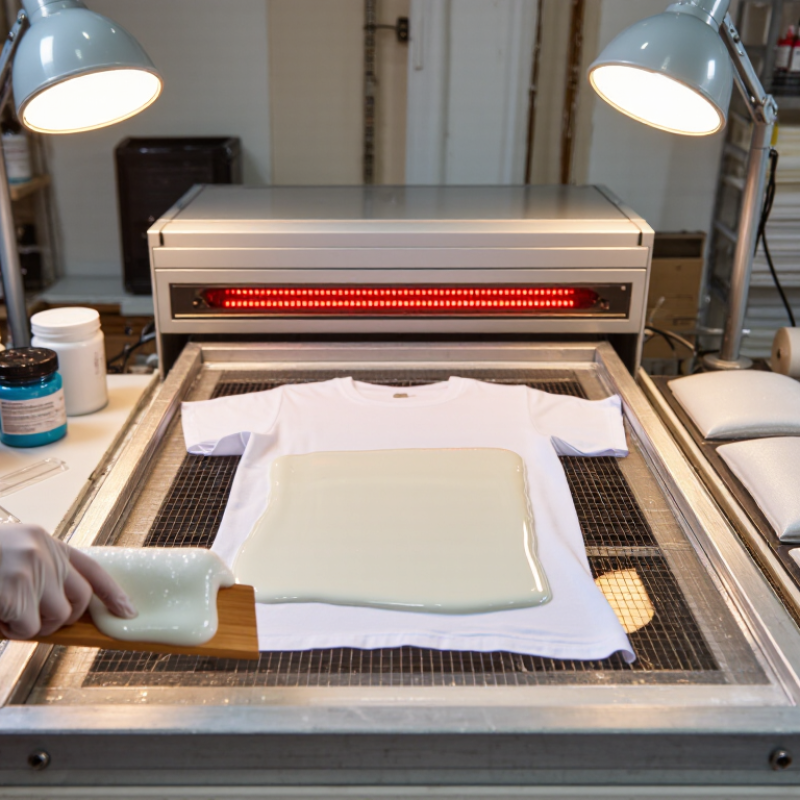
Start by defining the finished foam height, not only the wet paste deposit. For a low-profile texture, target 0.5–2.0 mm after curing. This range can add grip and visual depth without making fabric feel stiff. For a stronger raised effect, select paste capable of 2–5× expansion. A 2 mm wet layer may become much higher, depending on the formula and curing conditions. Measure the cured surface with a small thickness gauge. Guesswork often fails.
Tips: Print a test grid with several deposit levels. Record mesh count, squeegee pressure, drying temperature, and curing time. Keep fabric tension consistent. Expansion can change when the paste layer becomes too thick. I once increased the print deposit to gain more height, but the foam collapsed unevenly. That result looked acceptable from a distance, yet felt rough by hand.
Choose targets according to the garment’s use. A 0.5–1.0 mm profile suits lightweight shirts and detailed graphics. A 1.0–2.0 mm profile gives stronger tactile contrast. The 2–5× expansion range may suit bold lettering, but it can soften fine edges. Check adhesion after washing and flexing. Some surfaces need a slower cure. Results are not perfectly predictable, so keep a retained sample from every trial. Evaluate appearance, softness, height, and recovery after compression.
How to Choose Foaming Paste for Screen Printing in 2026?
Use the target range that matches the required foam structure: 0.5–2.0 mm for controlled foam height and 2–5× expansion for higher-volume foam development.
These are process-planning targets. Confirm the final result under the selected mesh, squeegee pressure, curing profile, substrate, and paste formulation.
Match Paste Viscosity to 32–77 Threads/cm Screen Mesh
How to Choose Foaming Paste for Screen Printing in 2026?
Match Paste Viscosity to 32–77 Threads/cm Screen Mesh
Choosing foaming paste starts with the screen mesh, not the container label. A 32–45 threads/cm mesh has wider openings and usually accepts a thicker paste. This helps build a fuller, softer foam layer on cotton or coated fabric. For 46–60 threads/cm mesh, choose medium viscosity. It should pass through the openings without flooding fine details. With 61–77 threads/cm mesh, a lower-viscosity paste often performs better. Fine mesh needs smooth flow and lighter squeegee pressure.
Test viscosity at a stable room temperature. Paste can feel loose in a warm workshop and stiff near a cold window. Record the temperature, mesh count, squeegee hardness, and print pressure. A practical test uses three strokes on a small fabric square. Look for clean edges, even foam height, and limited pinholes. Watch the deposit.
In production trials, I once used a thick paste on a 60 threads/cm screen. The print looked rich, but the mesh cleared poorly and small letters lost shape. That shortcut failed. Adjusting with a compatible thinner improved flow, although the foam became slightly less raised. This trade-off needs checking, not guessing. Mesh tension and emulsion thickness also change the result. A viscosity range is useful, but the final decision should come from an actual print test. Five minutes of testing can prevent a full batch from becoming uneven.
Compare Cure Profiles: 150–170°C for 60–90 Seconds
How to Choose Foaming Paste for Screen Printing in 2026?
Choosing foaming paste starts with its cure profile, not just its appearance after printing. Many formulations cure between 150–170°C for 60–90 seconds. This range affects foam height, softness, adhesion, and wash durability. A lower temperature may protect sensitive fabrics, but it can leave the paste under-cured. A higher temperature can improve bonding, yet excessive heat may flatten the foam or discolor the textile. Always confirm the paste’s technical data sheet before setting production parameters.
In practice, I test three temperatures within the recommended range. I print identical samples, then cure them for 60, 75, and 90 seconds. After cooling, I check surface rise, handle, cracking, and adhesion after washing. A small temperature change can create a visible difference. Do not trust a single successful sample. I once approved a print after heat testing, but later found weak adhesion near thicker ink areas. The mistake was uneven heat exposure, not the paste itself.
Tips: Use a calibrated oven or conveyor thermometer. Measure the fabric surface, not only the machine display. Keep print thickness consistent during testing. Record temperature, dwell time, foam height, and wash results. Allow samples to cool before judging softness. If results seem inconsistent, inspect airflow, loading distance, and fabric moisture. The best cure is not always the hottest one.
Check Textile Safety with OEKO-TEX, GOTS, and PFAS Requirements
Choosing foaming paste in 2026 means checking more than texture, expansion, and print height. The paste must suit the finished textile’s safety pathway. OEKO-TEX Standard 100 evaluates finished products and components against harmful-substance requirements, including relevant PFAS controls. Ask the supplier for current test evidence, not a general safety statement. A creamy paste can still fail after curing.
GOTS requires approved chemical inputs and restricts hazardous substances, including intentionally added fluorinated compounds. Its Version 7.0 requirements also emphasize chemical transparency and wastewater responsibility. ECHA’s 2023 PFAS restriction proposal covered more than 10,000 substances, showing why “PFAS-free” needs a defined test scope. Request the exact method, detection limit, and tested production lot. Vague paperwork is a warning sign.
Run a small trial on the actual fabric. Cure it at the planned temperature, then test washing, rubbing, and surface feel. Keep the print swatch. Record batch numbers and oven settings. Textile Exchange reported global fiber production at about 124 million tonnes in 2023, so chemical choices can affect a large, resource-intensive supply chain. I have seen attractive foam prints lose softness after repeated washing. That result is easy to overlook. Certification marks do not replace process control, and a supplier document may not represent your final print. Check the paste, fabric, ink layer, and curing process together. Sources: OEKO-TEX Standard 100, Edition 2025; GOTS Version 7.0; ECHA PFAS Restriction Proposal, 2023; Textile Exchange Materials Market Report 2024.
Validate Print Quality Through Wash, Stretch, and Adhesion Tests
How to Choose Foaming Paste for Screen Printing in 2026?
Foaming paste should be judged after abuse, not immediately after curing. A raised print may look sharp under studio lighting. It can still crack after washing or stretching. Textile Exchange reported 124 million tonnes of global fiber production in 2023. That scale increases the need for repeatable quality checks, not visual guesses.
I test printed fabric after curing at the supplier’s stated temperature and time. For washing, AATCC TM61 uses a 45-minute accelerated cycle that roughly represents five home launderings. I inspect height loss, color change, surface cracking, and edge lifting. AATCC TM150 can help measure dimensional change after laundering. Record results with photographs and fabric measurements.
Stretch the print across the garment’s normal movement zones. Use repeated pulls, then examine cracks under direct light. Adhesion needs a separate check. ASTM D3359 is designed for coated surfaces, so its cross-cut method may not perfectly represent soft textiles. Treat it as a reference, not absolute truth. My early tests focused too much on foam height. The print looked impressive, but adhesion failed around the collar. Testing 24 hours later also matters, because some films feel dry before full bonding. Keep a control sample from every production batch. Small process records often reveal more than one attractive sample.